Valentine’s Day Sweet Treats

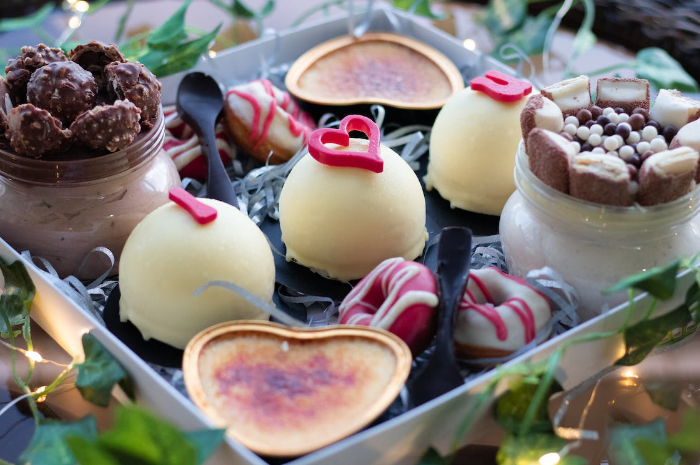
Here are a few fun ideas for Valentine’s Day sweet treats. These can be made ahead of time, enjoyed on the day or even be beautifully packaged to give as gifts for teachers, friends and family. They’re all fairly easy and something that kids of just about any age will enjoy helping with.
These Valentine’s Day Sweet Treats are all very versatile, so you don’t need to limit yourself to Valentine’s decorations. Switch up the sprinkles and colors to use for any special occasion or holiday.
1. Chocolate Banana Sundae Bites

Recipe inspired by Emilie from Finding Zest
Serves: 8-10 Bites
Ingredients
- 2 Large, ripe bananas, peeled
- ⅔ Cup milk chocolate chips
- 2 Teaspoons oil
- 8 Glazed cherries (fresh strawberries, cherries or raspberries work great too)
- Canned whipped cream
- Sprinkles
- 8-10 Toothpicks or heart cupcake picks
Instructions
- Cut bananas into 4-5 equal pieces, remove ends.
- Place bananas in a lined baking tray.
- Freeze bananas for 15 minutes to keep them firm and stop discoloration.
- Melt chocolate chips and oil in a microwaveable dish, slowly until just melted.
- Dip bananas about a ⅓ way into melted chocolate.
- Coat chocolate with sprinkles and return to baking sheet.
- Cool in fridge until chocolate is set, about 10 minutes should do.
- Top bananas with whipped cream.
- Add cherries/strawberries/raspberries to cupcake picks and gently push down into center of banana.
- Best served immediately but can be refrigerated up to an hour.
These can be assembled without cupcake picks or toothpicks too.
2. Chocolate Dipped Wafer Cookies

Ingredients
- Wafer Cookies
- Melting Chocolate (White, Milk or Dark)
- Sprinkles or Small Candy for Decorating
- Baking Paper or Silicone Mat
- Large Baking Sheet
Directions
- Slowly melt the chocolate in a microwaveable plastic container, stirring often.
- Dip the wafer cookies halfway into the melted chocolate.
- Place the cookies on a lined baking sheet or a silicone mat
- Decorate with sprinkles and small candy of your choice before melted chocolate sets.
- Let the chocolate harden before removing them from the baking sheet.
Store them in an airtight container until you’re ready to enjoy them. These sweet treats taste best eaten on the day of making.
2. Valentine’s Day Oreo Pops

Serves: 12 pops
Ingredients
- 12 Oreos
- 12 Lollipop Sticks
- 340g White melting chocolate with a drop of coloring of choice OR 340g Candy Melts (pink, red and white)
- Sprinkles
- Microwaveable bowls (Amount depends on how many colors you want to make)
- Baking Paper OR cake pop stand (to allow to set)
Instructions
- Twist and separate the Oreos into halves.
- Using a microwaveable bowl, melt a small amount of white chocolate or a few candy melts (any color), stirring every 10 seconds.
- Dip the tips of the lollipop sticks into the melted chocolate or candy and re-assemble the Oreos with the stick in between the 2 halves.
- Allow to set. You can freeze them for 10 minutes to speed up the process.
- Microwave a larger batch of white chocolate (with a drop of food coloring) OR candy melts in your first color of choice, stirring every 10-20 seconds.
- Dip the Oreo pops into the melted chocolate or candy, covering the cookie completely then place them on baking paper.
- Add sprinkles and decorations before the coating sets.
- Repeat the process for the other colors.
Transfer them to an airtight container if you’re not going to enjoy them right away, they’re best eaten within a week of making.
3. Valentine’s Day Marshmallow Pops

Ingredients
Serves: 8-12 pops
- 24 Marshmallows
- 340g Melting Chocolate of choice
- 8-12 Lollipop Sticks
- Sprinkles OR Red, white and pink candy melts
- Cake pop stand
Instructions
- Place 2 – 3 marshmallows on each lollipop stick. Try not to pierce the top of the last marshmallow – you don’t want the stick to poke through the end.
- Melt ½ a cup of melting chocolate at a time in a shallow microwaveable dish, stirring every 10-20 seconds. Melt more when needed so that the chocolate doesn’t harden while you’re making the pops.
- Roll the marshmallow pops in the melted chocolate, covering them completely. Use a spoon to touch up any uncovered spots if you struggle.
- Decorate with sprinkles or candy before chocolate sets.
- Position up straight in a cake pop stand and allow to set (you can place them on a lined baking sheet but this will create a flat side on the marshmallow pops)
- Allow to cool and set completely before serving.
Fun Idea: Melt a handful of red, pink and white candy melts in individual Ziploc bags in the microwave. Gently massage the bags to help melt the candy every 10 seconds. When the candy is soft, snip a small hole in the corner of the Ziploc bag and use as a mini disposable piping bag to decorate the Marshmallow Pops.
Note: Apparently the Marshmallow Pops can last for a few weeks in an airtight container. Just don’t store them in the fridge as this might cause the chocolate to discolor.
4. Chocolate Dipped Rice Krispies Valentine’s Treats

Recipe Source: Adapted from Kellogg’s Rice Krispies Recipes
Serves: 24 Treats
Ingredients
- 3 tablespoons (43 g) butter
- Non-Stick Baking Spray
- 1 packet (283 g) regular marshmallows OR 4 cups miniature marshmallows
- 6 cups Rice Krispies Cereal
- 340 g melting chocolate (white, milk or dark)
- Sprinkles
- Large baking sheet or 2 smaller ones
- Heart-shaped cookie cutter
- 24 lollipop sticks (optional)
Instructions
- Spray a large baking sheet with non-stick baking spray and set a side.
- Melt butter in a large saucepan over medium heat. Add marshmallows and stir until melted and smooth.
- Remove from the heat and fold in the Rice Krispies.
- Press the mixture into the prepared pans and leave to cool for an hour.
- Press out hearts using a heart-shaped cookie cutter. Try to fit them in as close to each other as possible.
- Place the treats on a sheet of wax paper.
- Melt the chocolate in a microwaveable bowl, stirring every 10-20 seconds until the mixture is melted and smooth.
- If you choose to use lollipop sticks you can place the sticks into the pointed edge of the heart-shaped treats.
- Dip half of the heart-shaped treat into the melted chocolate and place them on wax paper.
- Decorate with sprinkles before the chocolate sets.
- Allow to cool completely before serving.
- Leftovers can be stored for up to 24 hours in an airtight container.
You can really get very creative when it comes to decorating these treats.
5. Valentine’s Day Fruity Yoghurt Treats

Recipe inspired by Grace from Eats Amazing
Serves: 12-15 Treats
Ingredients
- 1 cup fresh or frozen raspberries
- ⅔ cup Greek yogurt
- 1-2 tsp maple syrup or honey
- Heart sprinkles
- Silicone muffin cups
Instructions
- Place 12-15 silicone muffin cups on a baking sheet (use one that fits in your freezer).
- Put the raspberries into a bowl and mash them with a fork.
- Add yogurt to the raspberries and mix together.
- You can add maple syrup or honey depending on how sweet you want it. Mix again.
- Scoop a spoonful of the mixture into each muffin cup, filling them about ⅓ of the way.
- Gently tap the baking sheet with the muffin cups on the counter to help level the yoghurt, then decorate each one with sprinkles.
- Place the baking sheet into the freezer and allow to freeze until set.
- Once frozen you can remove them from the silicone cups and enjoy or you can place them in a Ziploc bag and use them as needed straight from the freezer.
6. Cupid’s Arrows

Recipe inspired by Leanne from Organize Your Stuff Now.
Serves: 12 Cupid’s Arrows
Ingredients
- 24 Jelly Heart Sweets
- 12 Pretzel Sticks
Instructions
- Gently push one end of the pretzel stick into a jelly heart to form the “arrow head”. Make 12 of them.
- Cut a triangular shape out of the tops of the other 12 jelly hearts and gently push the other end of the pretzel stick into those jelly hearts to form the “feather” of the arrow head.
Look out my for cute free printables to attach to these Valentine’s Day sweet treats to make them even more enjoyable.
There you have 6 super easy Valentine’s Day Sweet Treats that will be a hit with anybody. I hope you and your little helpers not only had fun making them, but loved eating them. You can view all of my other recipes here.
I’d love to see some of your ideas so please tag me on Instagram or you could just leave me a comment if you like.


